
Create Payment Link
Create a production payment link from the Amwal Merchant Dashboard, optionally assign it to a branch, and share the generated link with the customer.
Create a production payment link from the Merchant Dashboard and optionally assign it to a specific branch.
Prerequisites
- Sign in to the Amwal Merchant Dashboard.
- Switch to Production mode.
- Create a branch first if you want the payment link to be associated with a specific branch.
Payment links can be created in Production mode only.
Create a payment link
- From the Merchant Dashboard, go to Payment Link.
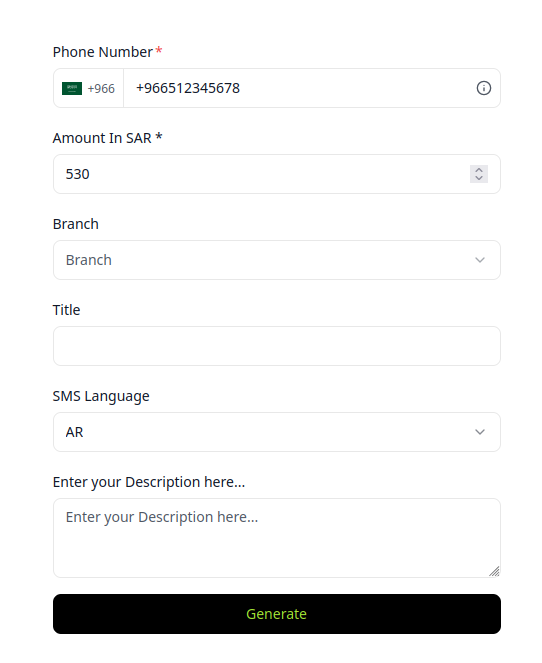
- Select Create Payment Link.
- Enter the customer Phone Number.
- Enter the Amount In SAR.
- Optional: select a Branch if the payment link should be created for a specific branch.
- Optional: enter a Title to help you identify the payment link later.
- Select the SMS Language.
- Optional: enter a description in Enter your Description here....
- Select Generate.
Payment link fields
| Field | Required | Description |
|---|---|---|
| Phone Number | Yes | Customer mobile number that will receive the payment link by SMS. |
| Amount In SAR | Yes | Payment amount in Saudi Riyal. |
| Branch | No | Branch associated with the payment link. Use this when you manage multiple branches and need to track the link under a specific branch. |
| Title | No | Internal title for identifying the payment link. |
| SMS Language | Yes | Language used for the SMS sent to the customer. |
| Description | No | Additional information about the payment link or purchase. |
Optional: Create a link for a specific branch
If your merchant account has branches, select the relevant branch from the Branch dropdown before generating the payment link. If you have not created a branch yet, create one from Branch Management first. The generated link will be associated with that branch for tracking and reporting.
If you do not need branch-level tracking, leave the Branch field empty and continue creating the payment link.
What happens next
After you select Generate, Amwal creates the payment link using the entered amount, customer phone number, SMS language, and optional branch details.
The Payment link generated confirmation page is shown after the link is created successfully. From this page, you can:
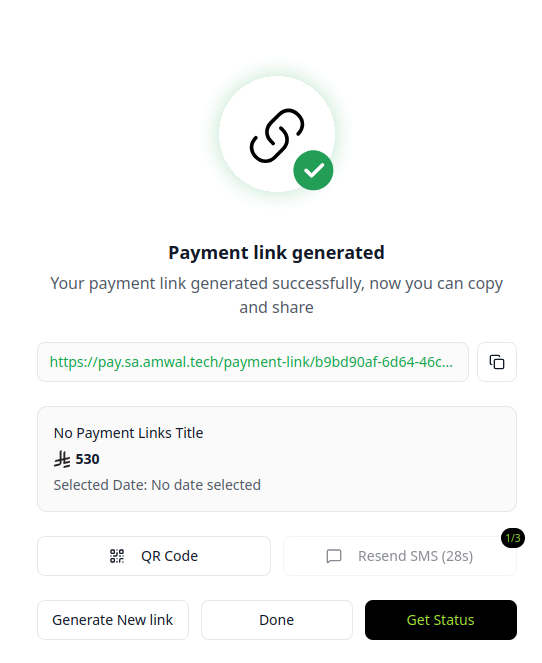
- Copy the generated payment link and share it with the customer.
- Review the payment link title, amount, and selected date if one was selected.
- Open or share the QR Code for the payment link.
- Resend the SMS to the customer when the resend timer is available.
- Select Generate New link to create another payment link.
- Select Done to close the confirmation page.
- Select Get Status to check the payment status.
The customer can then open the link from the SMS, copied URL, or QR code and complete the payment.
Updated 2 months ago