
Configurations
When performing the initial installation, you are required to click the save button in order to apply the default changes.
PrerequisitesIf you don't yet have Amwal Merchant account (either SANDBOX or PRODUCTION), please refer to our Amwal Integration Key guide to get started.
Quick Setup Overview
API Configuration
Amwal API Key
What it is: Your unique identifier for connecting to Amwal's payment services.
How to get it:
- Log into your Amwal Merchant Dashboard
- Navigate to the API Keys section
- Copy your Sandbox or Production key
- Paste it into the API Key field
Key Types: You can find detailed descriptions of all supported key types in our API Keys documentation.
Never share your API keys publicly or commit them to version control.
Amwal API Secret
What it is: Required for processing refunds directly from WooCommerce order details.
Setup Instructions:
- Go to Amwal Merchant Dashboard
- Find the Secret API Key section (located below Sandbox key)
- Copy the secret key
- Add it to your plugin configuration
The API Secret is only needed if you plan to process refunds through WooCommerce. If you handle refunds separately, this field is optional.
Guest Auto Login
Purpose: Improves user experience by automatically logging in guests after successful payments.
When to enable:
- ✅ You want guests to access order confirmation pages
- ✅ You have member-only content or features
- ❌ You prefer guests to manually create accounts
Effect: After a successful transaction, guests will be automatically logged in and redirected to the thank-you page with full access to their order details.
Step 1: Configure API Settings
- Navigate to WordPress Admin → Amwal Settings
- Enter your Amwal API Key from your merchant dashboard
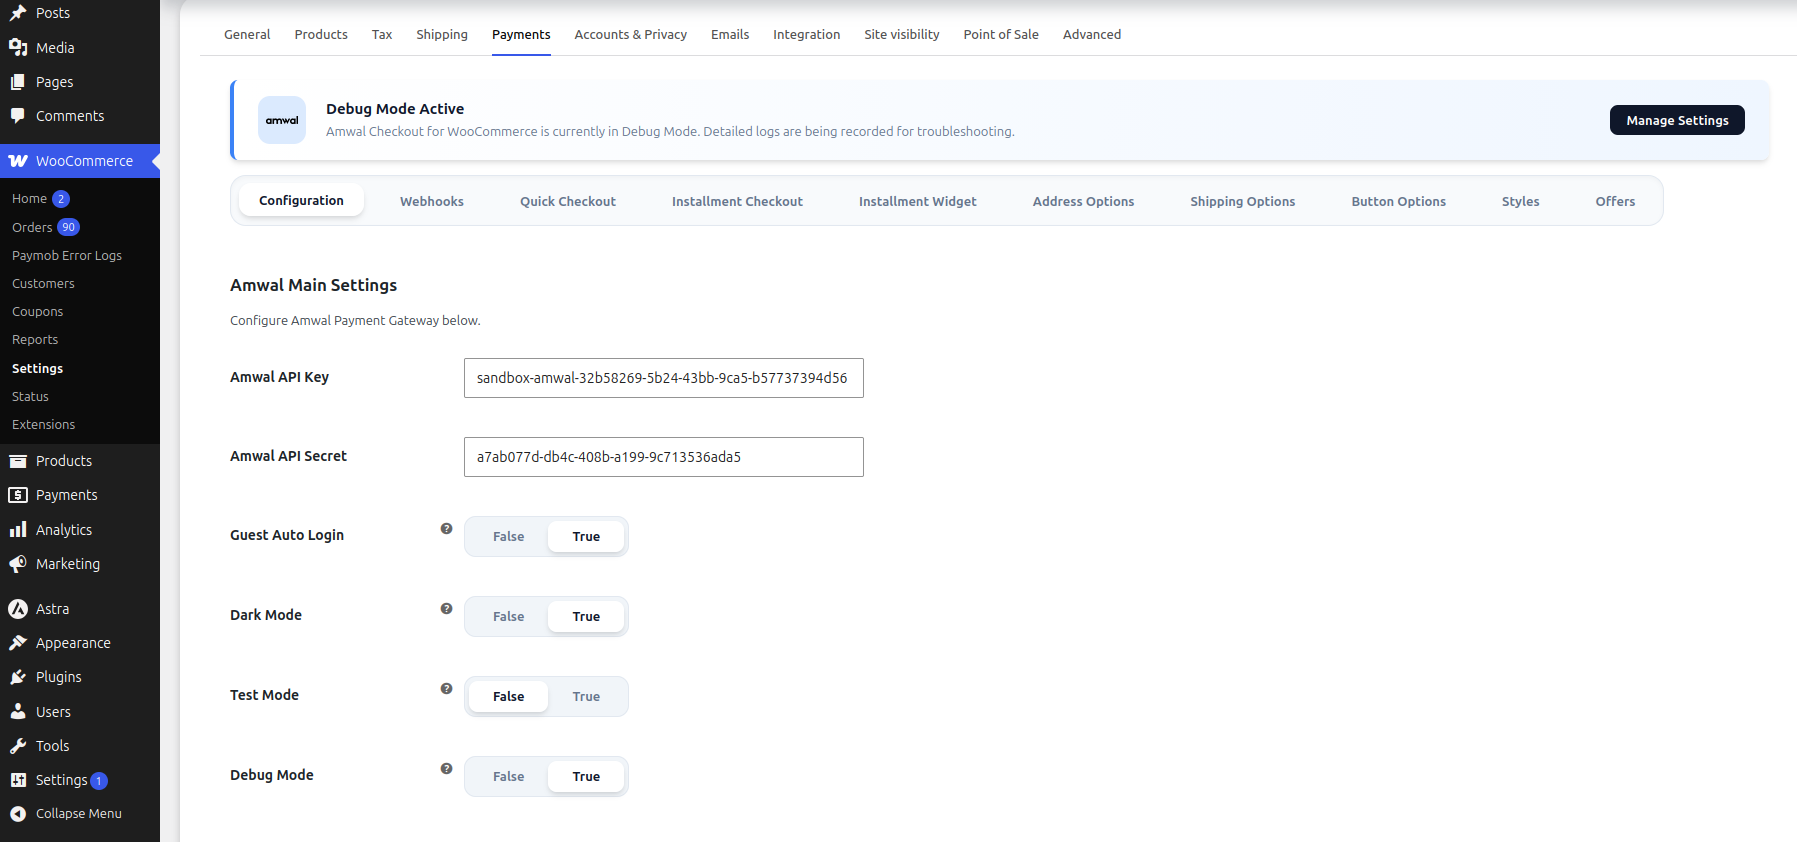
- Add your Amwal API Secret (if you need refund functionality)
- Configure optional settings (Guest Auto Login, Dark Mode)
- Click Save to apply changes
Always save your settings after making changes!
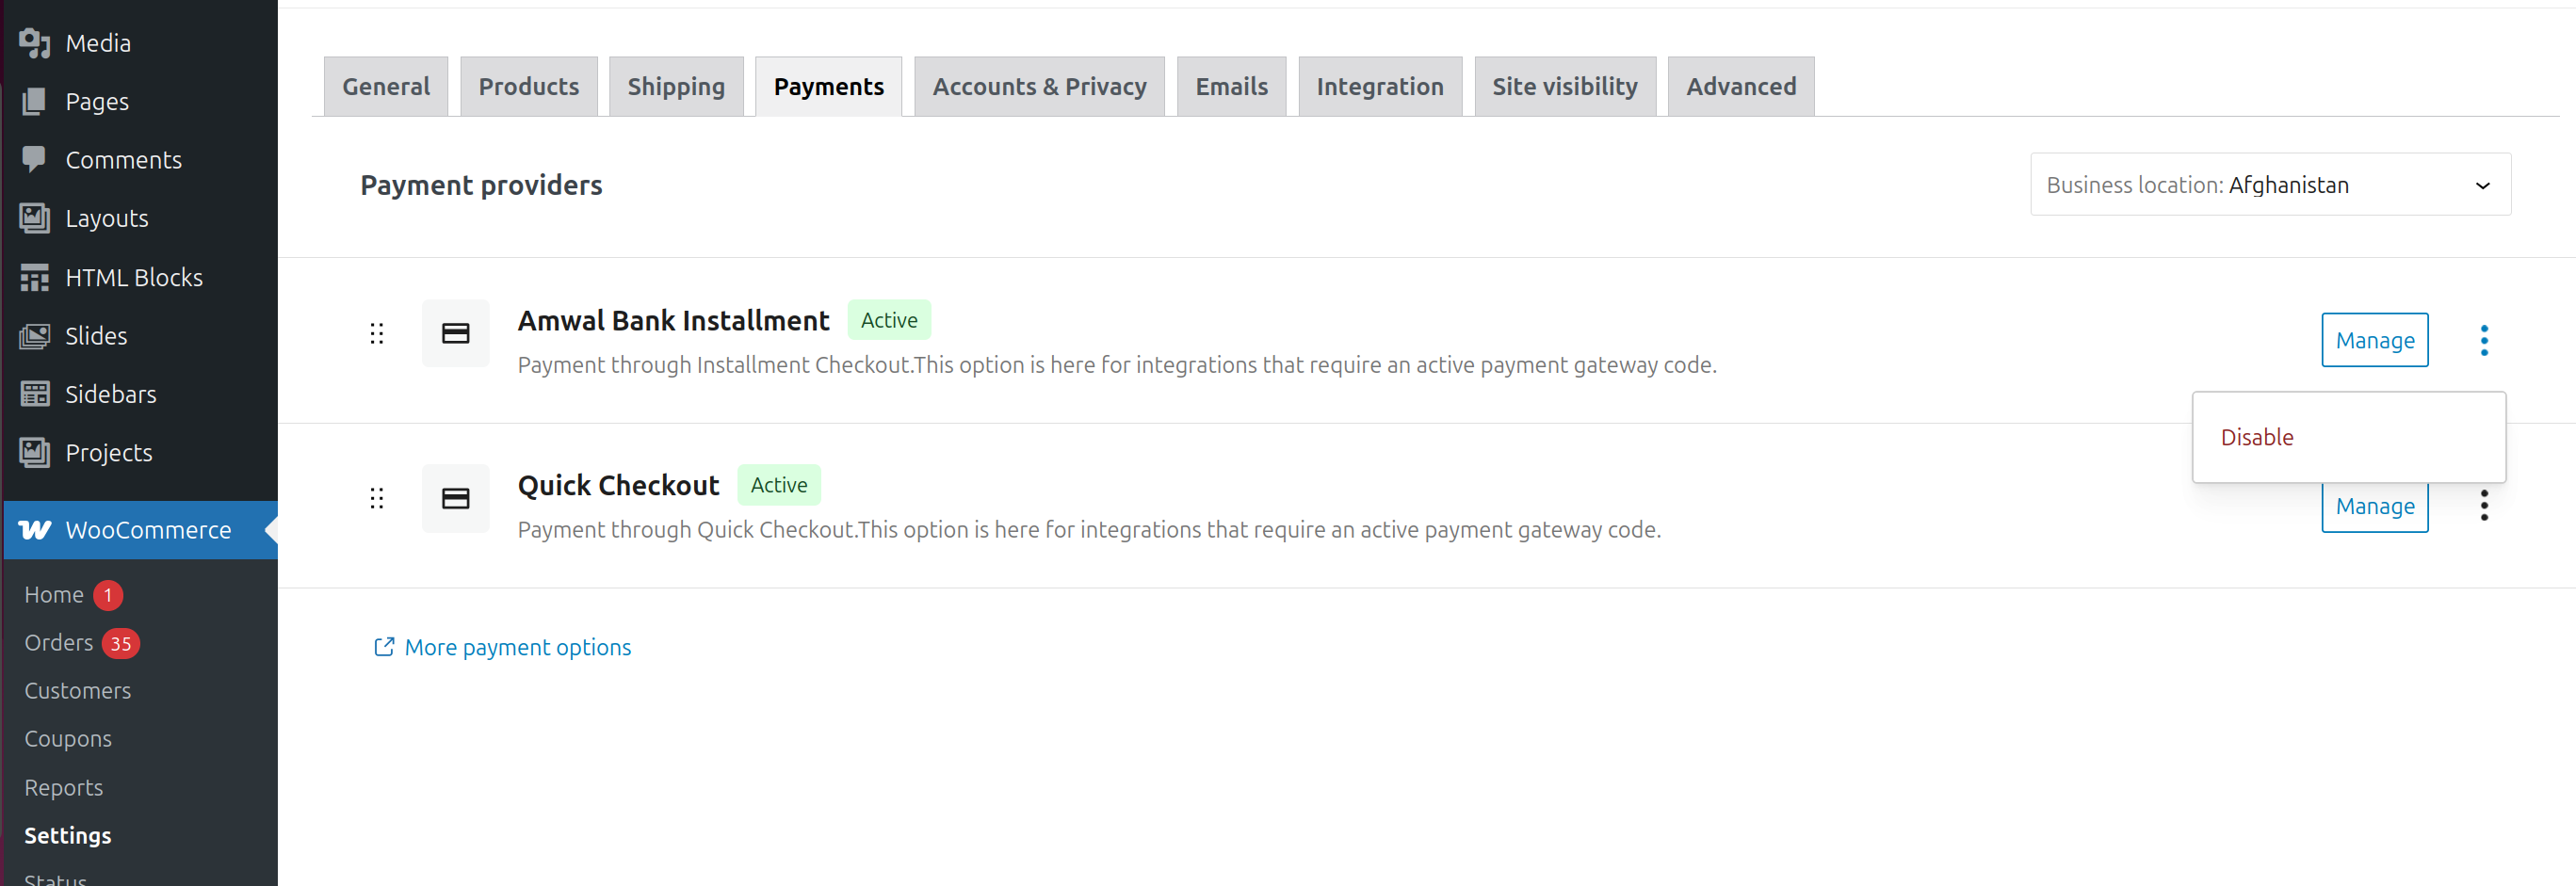
Step 2: Enable Amwal Payment Method
To make Amwal checkout available to your customers:
- Go to WooCommerce → Settings → Payments
- Find Amwal in the payment methods list
- Click the toggle switch to enable it
- Click Manage to configure additional settings if needed
Step 3: Configure Test Mode Settings
Important: The plugin starts in "Test Mode" by default, meaning only logged-in administrators will see the Amwal checkout button.
To go live:
- Uncheck "Test Mode" in the settings
- Save your changes
- The button will now be visible to all shoppers
Before going live, ensure you've completed testing with sandbox credentials and switched to production API keys.
Display & User Experience
Dark Mode Configuration
Purpose: Customize the Amwal checkout button to match your site's theme.
Light Mode (Default)
Best for:
- Light-themed websites
- Traditional e-commerce designs
- High contrast requirements
Dark Mode (Enabled)
Best for:
- Dark-themed websites
- Modern, sleek designs
- Reducing eye strain
Choose the mode that provides the best contrast and readability with your site's color scheme.
Debug Mode
Purpose: Enable detailed logging for troubleshooting integration issues.
When to enable:
- 🔧 During initial setup and testing
- 🚨 When experiencing payment processing issues
- 📊 For monitoring transaction flows
What it logs:
- API request/response data
- Error messages and stack traces
- Payment flow steps and timing
- Integration validation results
Disable debug mode in production to optimize performance and avoid filling up log files.
Testing and Validation
- ✅ API keys configured and saved
- ✅ Test transactions completed successfully
- ✅ Refund functionality tested (if using API Secret)
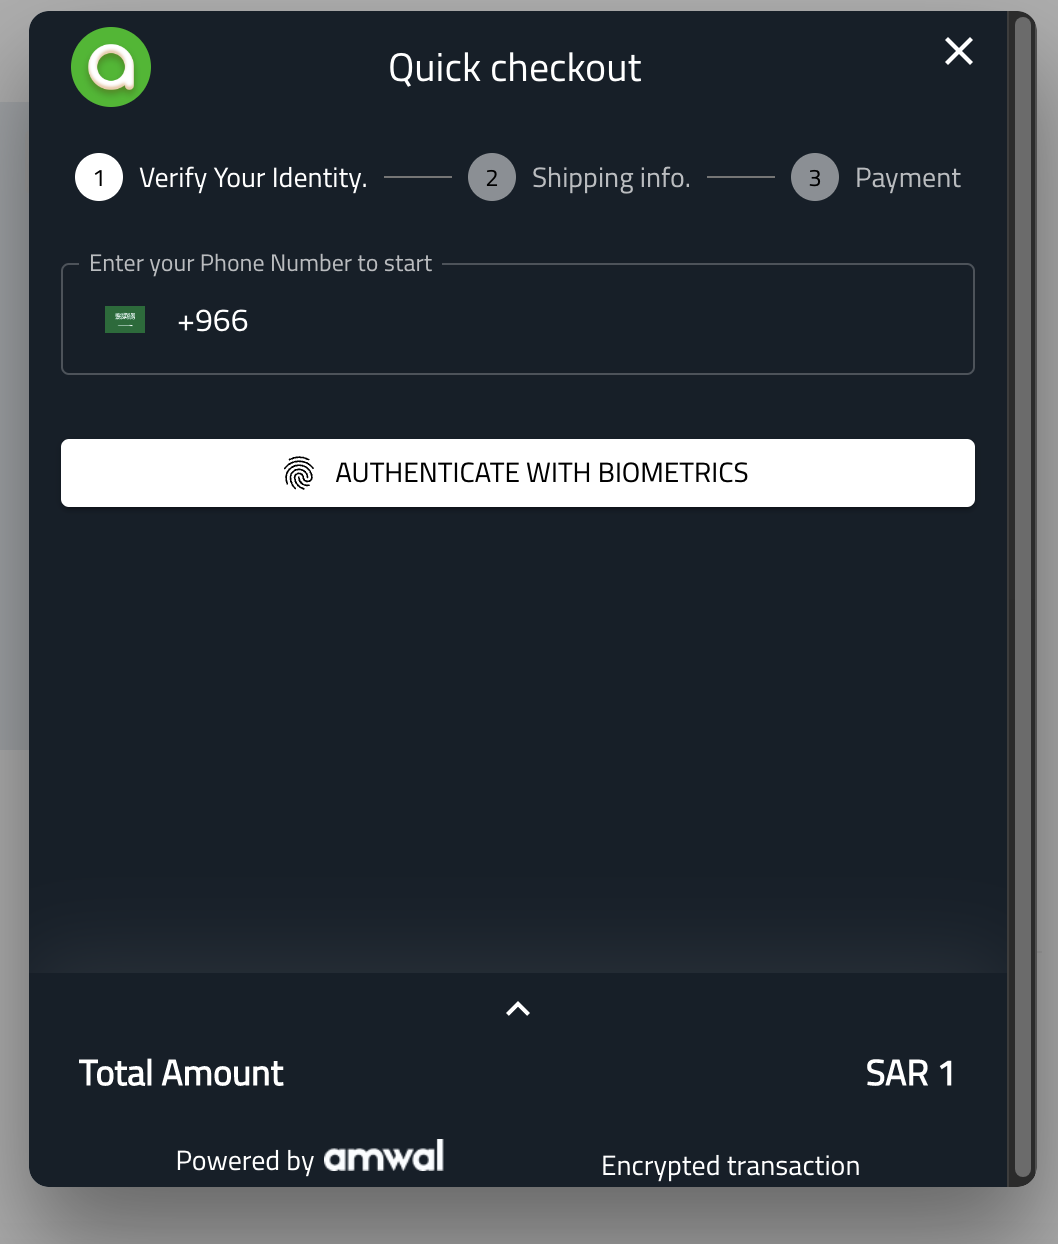
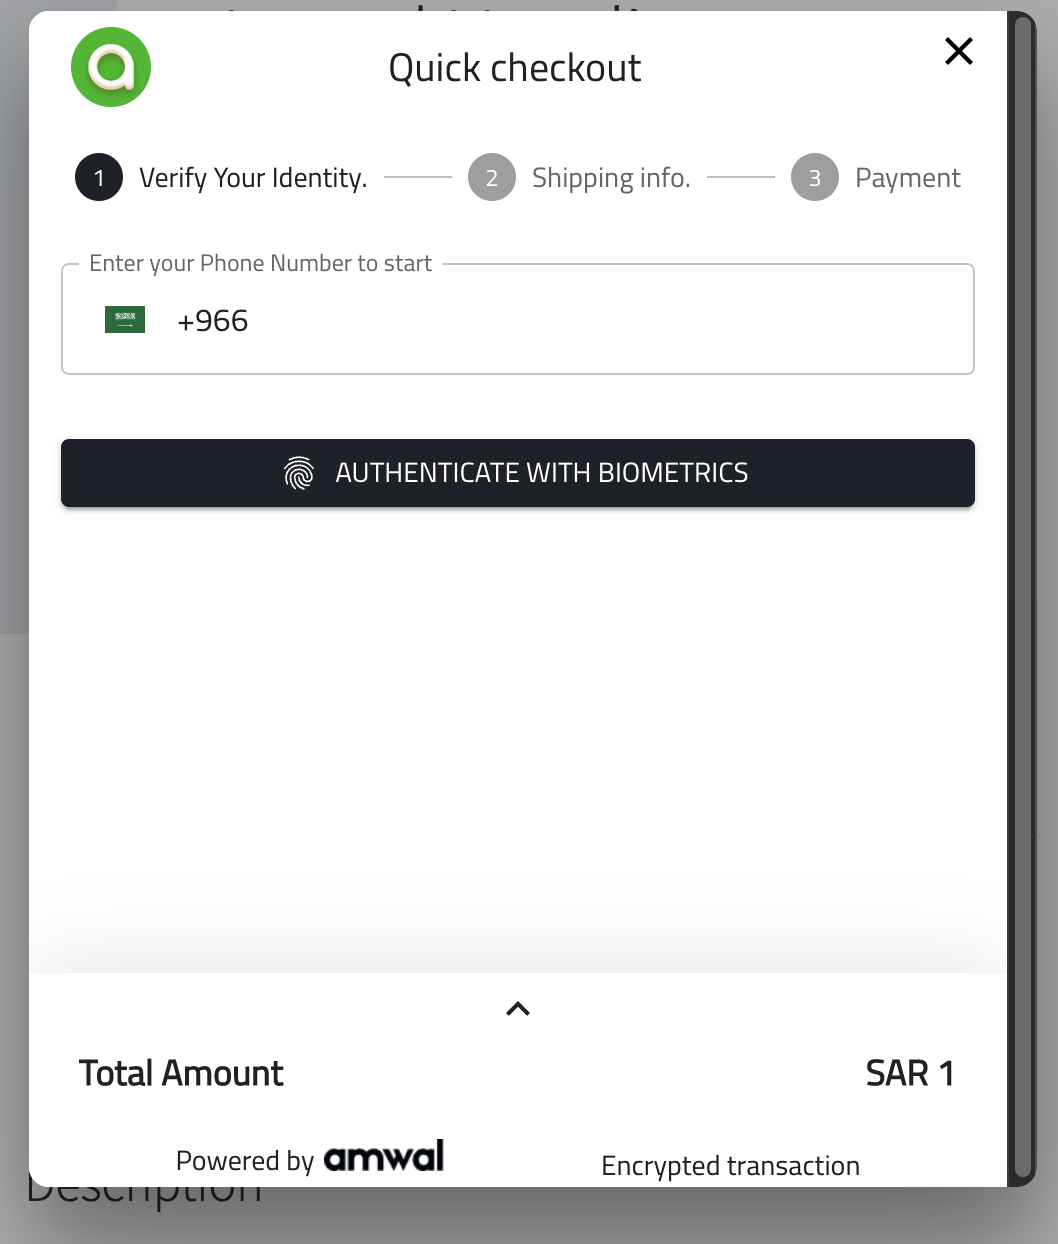
- ✅ Button appears correctly in test mode
- ✅ Order confirmation emails working
- ✅ Guest auto-login tested (if enabled)
- Button not showing: Check if test mode is enabled
- Payment fails: Verify API key is correct and active
- Refunds not working: Ensure API Secret is configured
- Style issues: Try toggling dark mode setting
- Debug logs empty: Confirm debug mode is enabled
Your Amwal integration is now configured. Your customers can enjoy fast, secure checkout with just a few taps.
Updated about 23 hours ago