
Branch Users
In physical retail environments, store staff need access to create in-store payment links and display customer QR codes without accessing corporate financial statements or store API keys. Branch User Management provides a frictionless workflow to assign frontline personnel to their designated retail store.
1. Onboarding Branch Staff
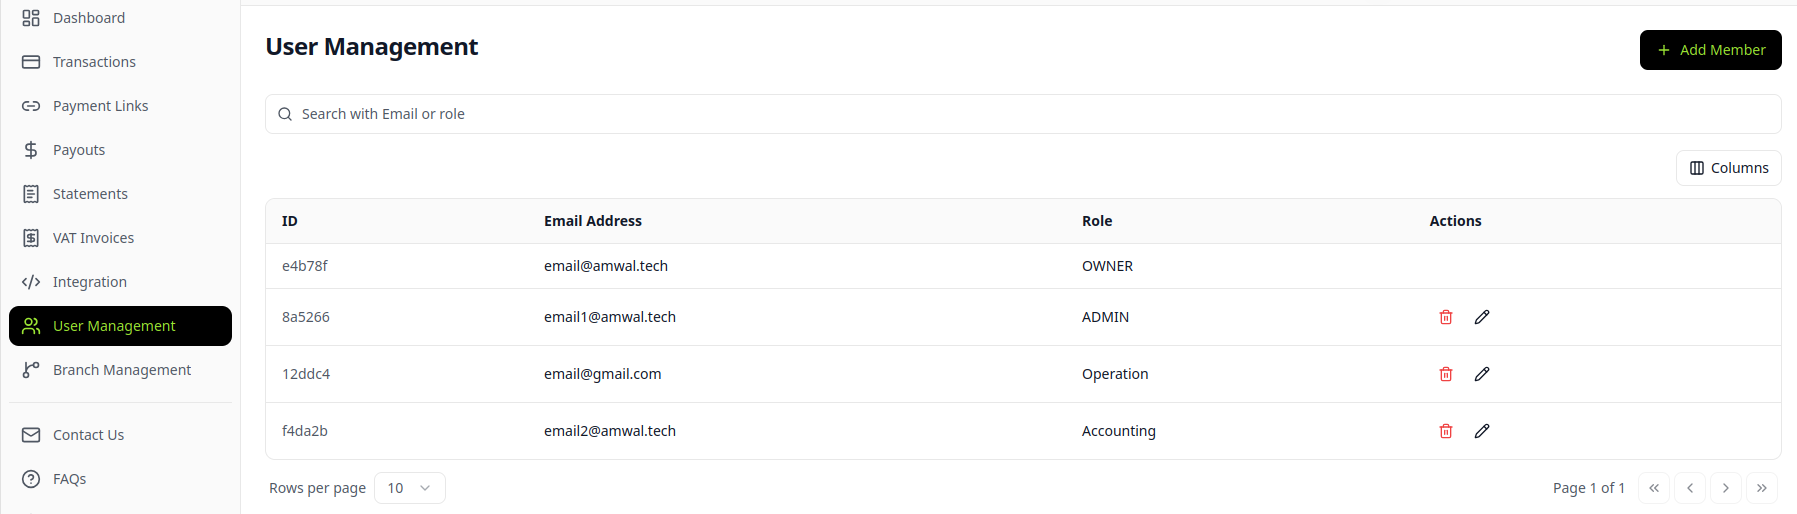
Step 1: Open User Management
From the left navigation menu, open User Management (marked 1) and click + ADD MEMBER (marked 2):
Step 2: Select Role & Trigger Branch Selection
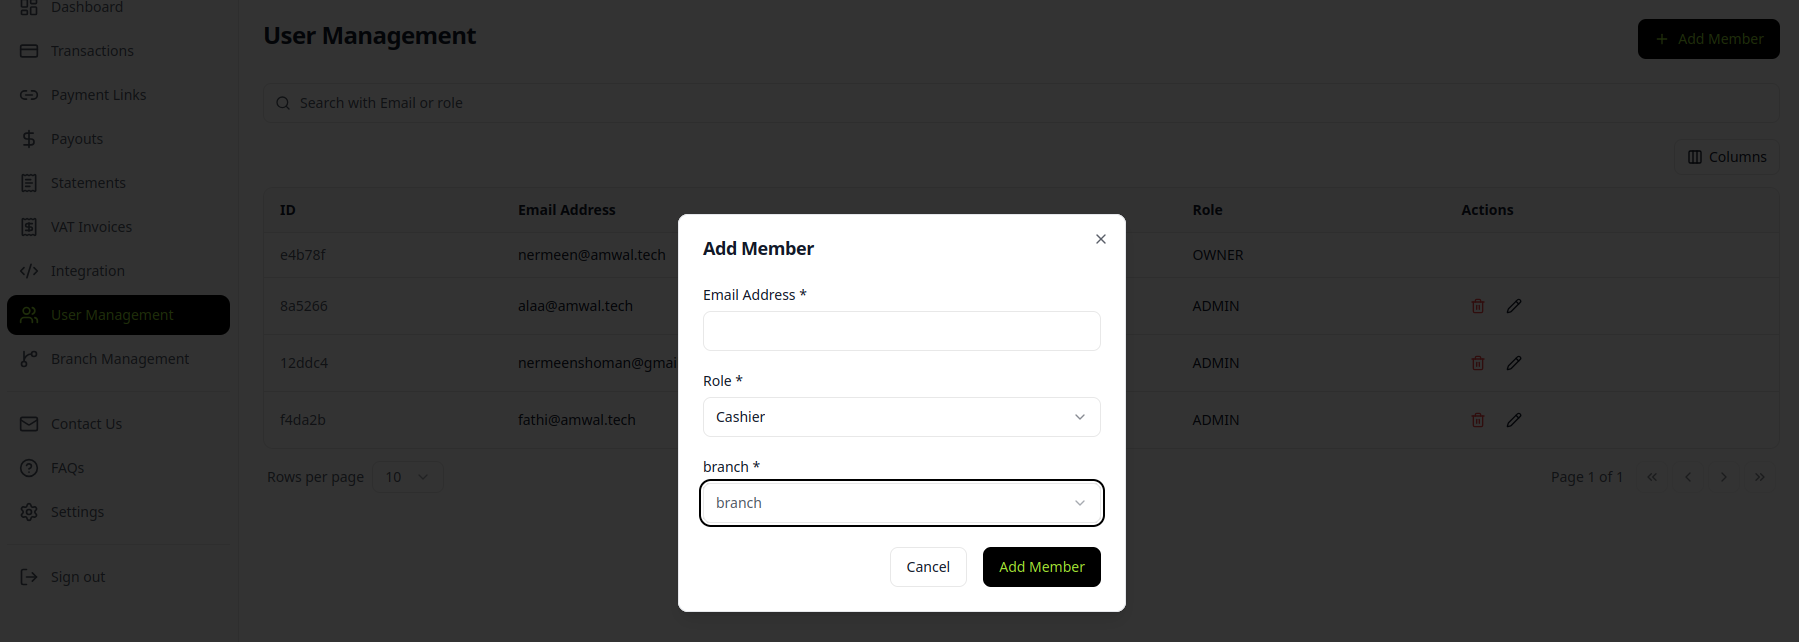
Enter the employee's corporate email address and select either Supervisor or Cashier from the Role dropdown:
Automatic Branch Field Activation
Selecting Supervisor or Cashier automatically displays the Branch selection field. Head-office roles (Owner, Admin, Accounting) do not require branch assignment.
Step 3: Link to an Existing Branch or Create New
You can link the staff member to an existing store location or provision a new branch on the fly:
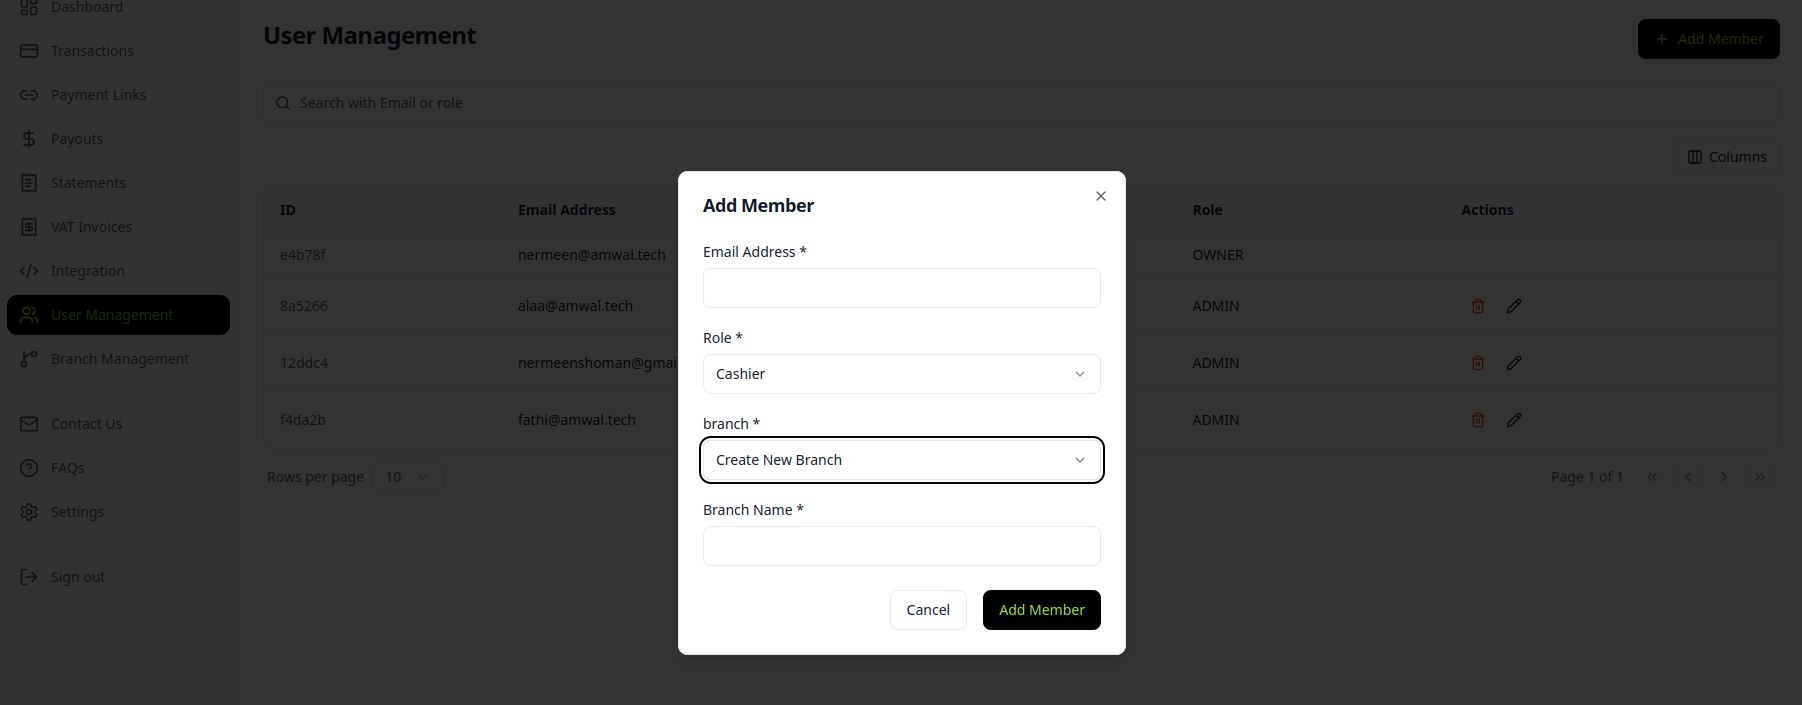
- Assign Existing Branch: Choose a pre-configured branch from the dropdown menu (1).
- Create New Branch Inline: Choose
Create New Branch(2) and enter the new retail store name into the text field (3). - Click ADD MEMBER to save and send the activation invitation.
2. Managing Staff Reassignments & Departures
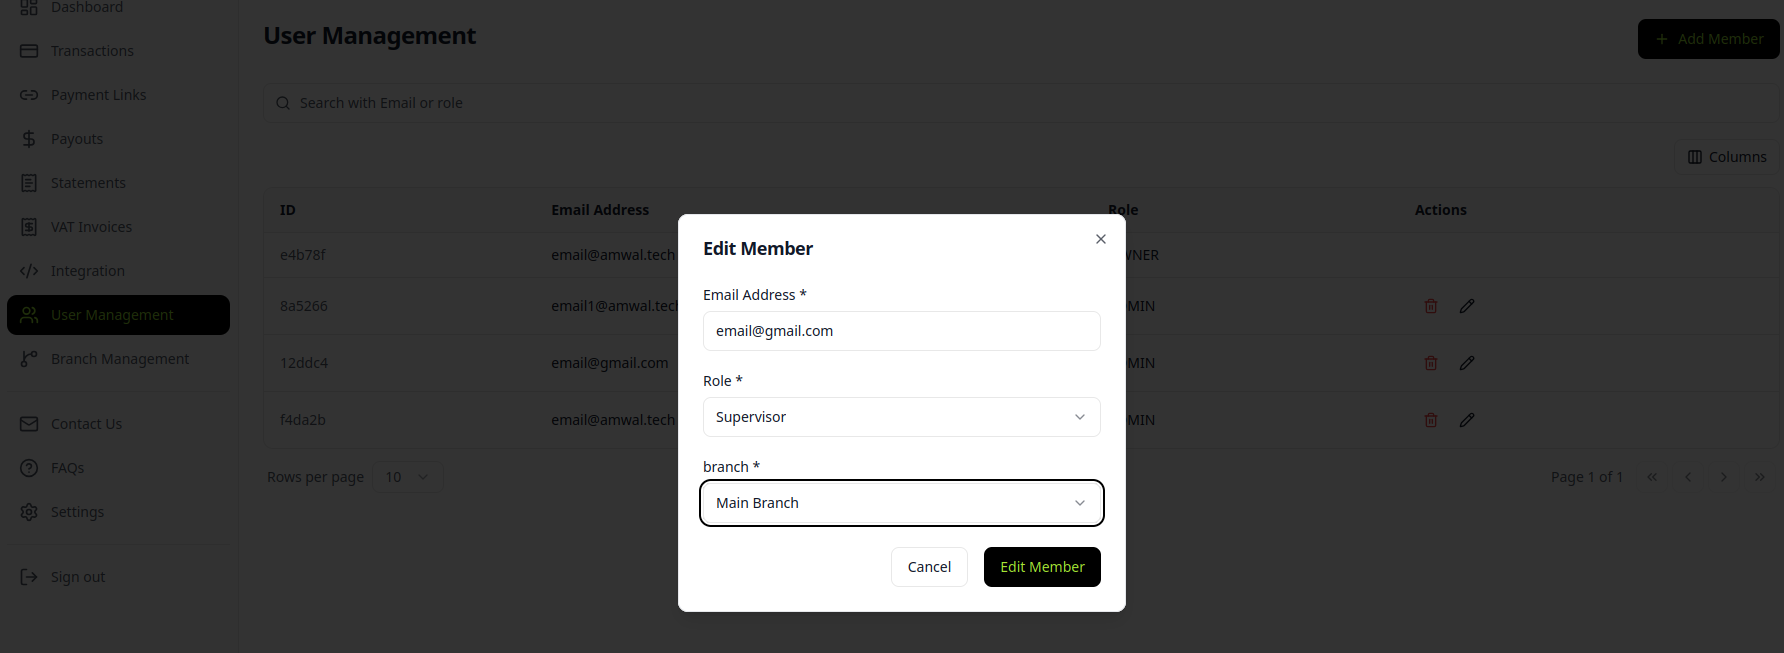
- Staff Rotation (Edit): When a cashier is transferred to another branch location or promoted to supervisor, click the Pencil (Edit) icon to update their assignment instantly.
- De-provisioning (Delete): When an employee leaves the company, click the Trash (Delete) icon to immediately terminate their dashboard access and active sessions.
Branch Management
Configure physical retail locations, assign in-store supervisors and cashiers, and manage location-based sales tracking in the Amwal Merchant Portal.
Create Payment Link
Complete operational guide to generating dynamic SMS payment links, social commerce URLs, and in-store checkout QR codes in the Amwal Merchant Dashboard.